Git Tutorial
Jakob Jenkov |
Git is a distributed version control system often used to version software source code. A version control system keeps track of different versions of the sources files in a repository. A distributed version control system keeps track of source across multiple repositories. Thus, John and Mary can each have their own repository with source code for the same project, and then pull updates from each other's repositories. Don't worry if it sounds complicated. It will all be explained in this Git tutorial.
Git was originally developed by Linus Torvalds, the smart guy who brought us Linux. Linus was unhappy with the existing version control systems available, and thus set out to develop something different. Something that met the needs of the very distributed team of Linux kernel developers.
Today Git is very popular, and lots of open source code is hosted in Git repositories on GitHub, BitBucket and Google code. These are all services that host version control repositories for developers.
Installing Git
The official Git implementation is a command line tool. In order to use Git you must first install it. There are several ways you can get Git installed on your machine. If you prefer a command line interface, go to the official Git website and download and install Git:
Atlassian SourceTree
If you prefer a graphical user interface then I would recommend using Atlassian's SourceTree. It is an easy to use graphical Git client which can connect to both local and remote (hosted) Git repositories including GitHub and BitBucket. SourceTree is very popular too. I will be demonstrating how to work with Git with SourceTree in this tutorial. You can get Atlassian SourceTree here:
This tutorial uses SourceTree v. 1.6.12.0 . If you use a different version of SourceTree, the GUI might look a bit different from the screenshots I have shown here, but the basic principles will be the same.
Git Core Concepts
Before showing you how to use Git I will first explain Git's core concepts, and how you most often work with Git. Once you understand that, it will be easier for you to dive into the many different Git commands available.
The Git Repository
Git is centered around the concept of a repository. A repository is a kind of database that keeps track of all the versions of the source code added to it. A repository is stored on your local disk, but can also be stored on a remote server. Here is an illustration of a Git repository:

A Git repository typically contains the source code for a single project. However, you can keep multiple projects in a single Git repository, or split big projects up into multiple Git repositories. Exactly how you organize your code into repositories is up to you. For a start, just start with one Git repository per project, and if the project grows, split independent subprojects into their own repositories.
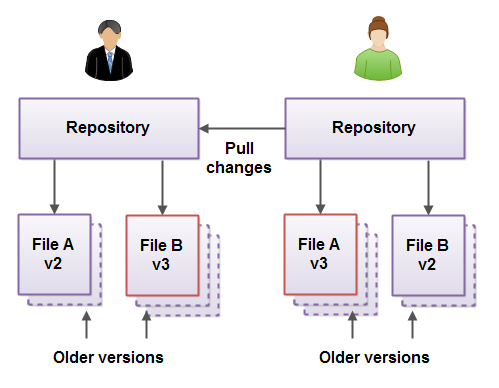
All developers working on the same project have their own Git repository for that project on their local disk. That means that each developer have a copy of the project code in their Git repository. These Git repositories may even contain different versions of the project files (to a certain extent) while the developers work on different parts of the project. Here is an illustration of this situation. One developer has changed File B, while the other has changed File A, both in their own copies of the project (in their own repositories).

Pulling Changes From Other Repositories
Once a developer finishes a feature, the other developers can pull that feature into their own Git repositories, and thus create an up-to-date version of the whole software project. Here is an illustration of a Git pull operation. Developer 1 (on the left) pulls changes from the repository of developer 2 (on the right).
After the pull, the developer who made the pull will have the latest changes from the repository he or she pulled from. In the previous situation, after developer 1 made a pull from developer 2's repository, developer 1's repository would look like this:
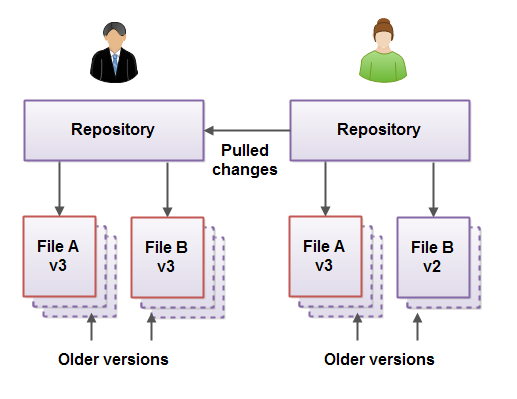
As you can see, developer 1 now has the latest version of File A, which was changed by developer 2.
A pull operation is one-directional. In the above case, developer 1 pulled the changes from developer 2's repository, but developer 2 did not get any of developer 1's changes. To update both repositories to the latest version of all files, both developers would have to do a pull from each others repositories.
The fact that each developer has his own repository with a copy of the code, which may even be somewhat different from what all the other developers have, is what makes Git distributed. The code is not kept in a single, central "master" repository, but distributed out over lots of repositories.
Using a Release Repository
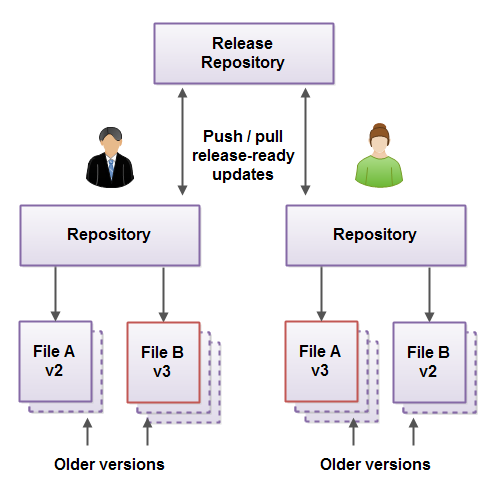
It is not uncommon for a project to create a "release repository" where finished features are pushed to, and where all developers can get the finished version of the latest feature from. This release repository then works as a defacto master repository.
Having a release repository makes it easier for developer to keep their repositories up-to-date with changes from other developers. Instead of having to pull changes from all other developers on the team, a developer can just pull changes from the release repository. That way the developer gets the latest updates, and only get the updates when they are actually functioning, as in "ready for release". Here is an illustration of two developers using a release repository to coordinate updates:
Create a Git Repository
Now that you have seen the core concepts, let us get started with Git. To use Git, the first thing you need to do is to create
a Git repository. This is calling "initializing" a Git repository. You do so using the Git init
command. I will show you how init a Git using Atlassian SourceTree which is my favourite Git client.
In the upper left corner of SourceTree you will find the "Clone/New" button. Click this button to create a new Git repository. Here is a screenshot of the SourceTree "Clone/New" button:
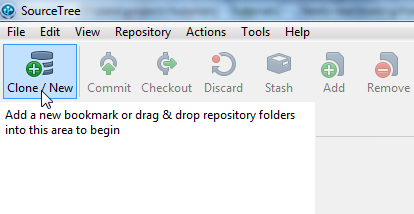
When you click the "Clone/New" button the following dialog opens:
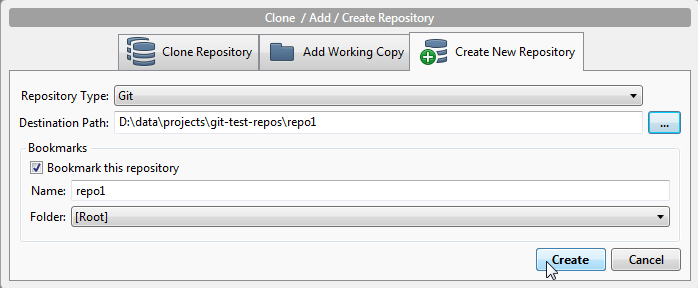
In the dialog's "Destination Path" field, type in the path on your local disk to where the Git repository is to be located. You can also click the "..." button to browse your way to the directory where you want to create the Git repository.
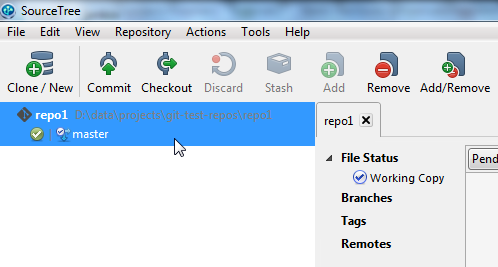
When you have entered the destination path of the Git repository, click the "Create" button. SourceTree will now create the Git repository for you. When the Git repository is created, SourceTree will show the new Git repository in the left side of the screen, as you can see in this SourceTree screenshot:
The Git Repository Workspace
A Git repository has a workspace. The workspace is where the work editions of the files in your project are stored.
The workspace is located in the same directory in which you created the Git repository. That is, in the same
directory which contains the .git subdirectory.
As you "commit" files to the repository, copies of the work editions will be inserted into the Git repository
(the .git subdirectory). The repository will keep track of the many different versions of the files
you commit. The workspace will always only contain the latest version of the file, but the repository (the
.git directory) will contain
all previously committed versions too.
The workspace can contain subdirectories, but do not put any of your files or directories into the .git
directory. This directory is reserved for Git. In general you should not mess around in the .git directory
unless you know exactly what you are doing. You risk destroying your Git repository.
Commit Files to a Git Repository
Once you have created a Git repository your next step will be to commit files to the repository. You will normally either: commit new files, or commit new versions of existing files, or commit removal of files to the repository.
- Commit new files to the repository.
- Commit new versions of already added files to the repository.
- Commit removal of files to the repository.
Each of these actions will be covered in the following sections.
Commit New Files to a Git Repository
First
you need to create a file in the repository workspace. In the examples shown later I have created a single
file named file-1.txt to the workspace with the text "This is version 1" inside.
The files you create in the workspace are divided into two groups:
- Unstaged files
- Staged files
When you first create a file in the repository workspace, that file is unstaged. When you commit the workspace to
the repository, only staged files are included in the commit. To commit a file you must first add it to the staged
file set. In SourceTree you do so in the right side of the GUI. Here is a screenshot that shows the unstaged
file file-1.txt in the unstaged file area of the SourceTree GUI:
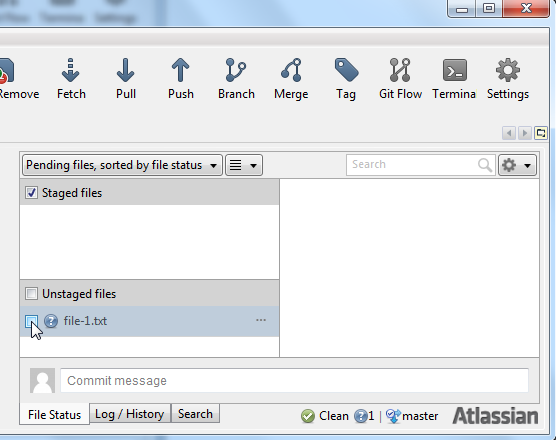
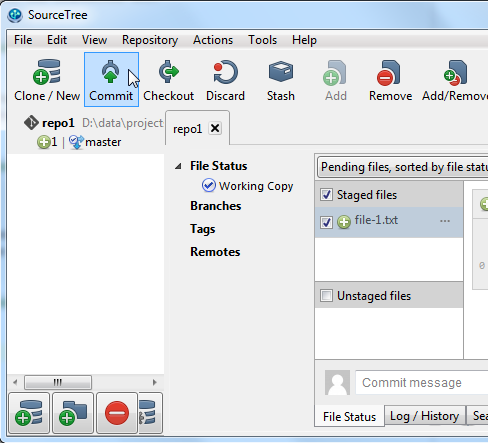
You add a file to the staged file group in SourceTree by clicking on the checkbox to the left of the file name.
Here is how the SourceTree GUI looks after adding file-1.txt to the staged file group:
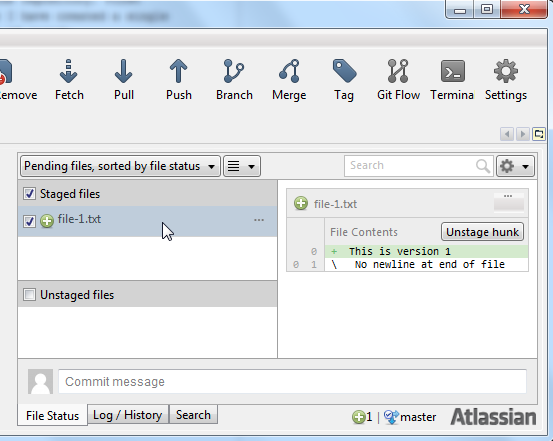
You can now commit file-1.txt to the repository by clicking the "Commit" button in the upper left part
of the SourceTree GUI. Here is a screenshot showing the "Commit" button:
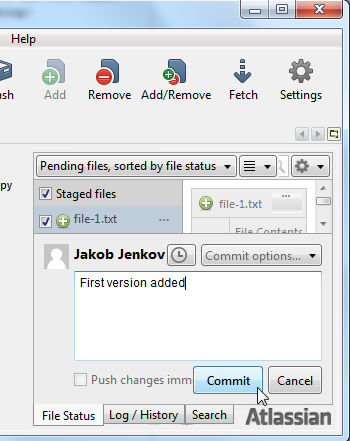
When you click the "Commit" button a small dialog opens in the bottom right part of the SourceTree GUI. In this dialog you can type in a text which describes the changes you have made to the files being committed. This description can be useful later when going through the commit history to see what changes were made to the files.
In this case I just enter "First version added" in the commit dialog and click the "Commit" button below the dialog (not the "Commit" button in the top left part of the GUI you clicked to open the commit dialog). This screenshot shows the SourceTree GUI just before I click the "Commit" button:
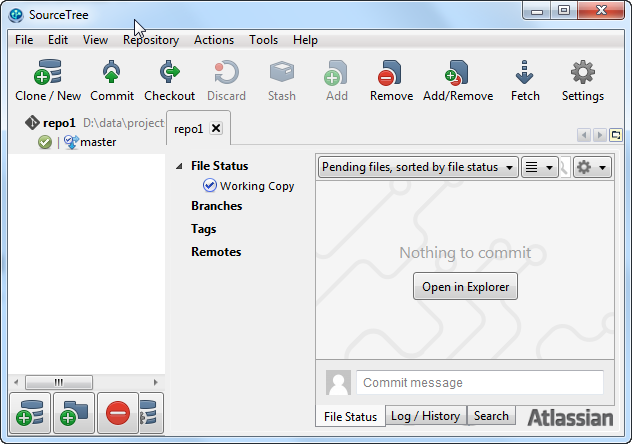
The screenshot below shows how SourceTree looks after the commit. Now SourceTree says that there is nothing to commit anymore. That is because all staged files have been committed, and no unstaged files exist.
Commit New Versions of Files To a Git Repository
You will often make changes to a file after it has first been added to a Git repository. Once you have a new, stable version of your file you may want to commit that version to the Git repository.
In SourceTree the process is very similar to the process used to add the file the first time. To demonstrate adding
a new version of a file I have changed the text inside file-1.txt to "This is version 2".
After the changes have been saved to file-1.txt SourceTree app needs a little time to update the GUI.
After the update the right side of the SourceTree GUI now looks like this:
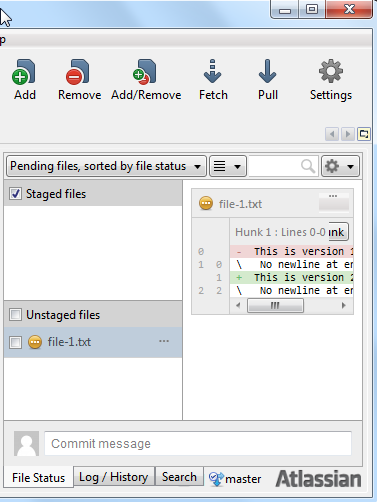
As you can see, file-1.txt is once again located in the unstaged file area.
To commit the new version of file-1.txt click the checkbox next to the file name in the unstaged
area. That will add the file to the staged file set. Once the file is added to the staged file set, you commit
in the same way you committed the file when it was first added.
Committing Multiple Files at a Time
Every commit to the repository should ideally represent a fully coherent, functional version of all files in the project. Imagine if your committed file contains compile errors because it depends on a new version of another file you have not yet committed. This will prevent developers who get your committed file out of the repository from doing their work, because now the project does not compile. We want to avoid that.
To make sure that your commit keeps the project in a coherent, functional state, you may sometimes have to commit more than one file in the same commit operation. Doing so is easy. Simple add all the files to be committed from the unstaged file set to the staged file set, and commit the files. The process is the same as if committing just a single file.
Deleting Files From a Git Repository
Sometimes you may also need to delete files from your project. These files then also need to be deleted from the project's Git repository.
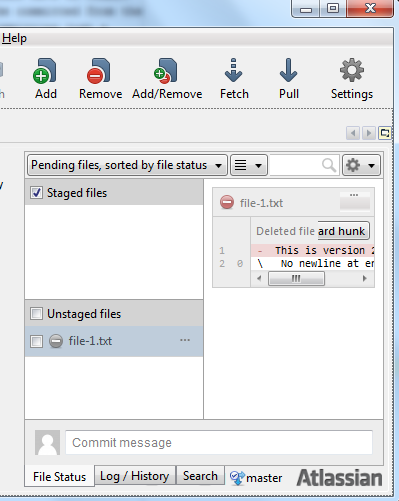
To delete a file from your project, simply delete the file from the repository workspace. Once the file is deleted from the workspace, SourceTree will scan the workspace and detect that the file has been deleted. The file will then be shown in the unstaged file area as deleted. Here is a screenshot of how that looks:
To delete the file from the repository too, add the deleted file to the staged file set, and click "Commit". The rest of the process of committing the removal of a file is similar to committing a new file or a new version of a file. Type in a description of what changes are committed to the repository, and click the "Commit" button under the commit dialog. The file is now deleted.
| Tweet | |
Jakob Jenkov | |


