HTML Text Formatting Elements
Jakob Jenkov |
HTML contains several elements that are used to format the text in the HTML page. For instance, elements exists to markup headlines, paragraphs, bold, italic, underlined text etc. This text looks at these HTML elements.
Today, much of the visual styling of HTML text elements is done via CSS. But, you still use the HTML elements to mark the structure of the text elements. For instance, to mark paragraphs, headlines etc.
The h1 to h6 Elements
The <h1> to <h6> elements are used for document headings. A heading can be a title for a page, paragraph, chapter, etc. The <h1> element define the main heading(s) of the document. The <h2> element defines a heading smaller than <h1> etc. The <h6> element can be used as the least important heading.
Heading elements are typically displayed in a larger font than the rest of the text in the HTML document.
Here is how the heading elements look in HTML code:
    <h1> heading 1 </h1>
    <h2> heading 2 </h2>
    <h3> heading 3 </h3>
    <h4> heading 4 </h4>
    <h5> heading 5 </h5>
    <h6> heading 6 </h6>
Here is how the heading elements look in the browser:
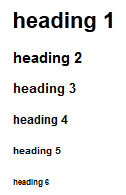 |
| The h1 to h6 heading elements as they look in a browser. |
And here is an example document that uses the <h1> and <h2> elements:
<html>
<body>

<h1>The Big Problem</h1>

<p>
  The big problem consists of two smaller problems.
  Problem 1 and problem 2. Both are covered in more detail
  in the following sections.
</p>

<h2>Problem 1</h2>

<p>
    Problem 1 is about...
</p>

<h2>Problem 2</h2>

<p>
    Problem 2 is about...
</p>

</body>
</html>
Even if HTML has 6 heading levels, you will most often only use 2 or 3 levels. If you use more, it can easily get confusing for the reader.
The p Element
The <p> element marks a paragraph of text in the HTML document. A paragraph contains multiple sentences that are related to each other. Two paragraphs following each other will be displayed with space in between to mark the different paragraphs. Here is an example:
<p> paragraph1 </p>
<p> paragraph2 </p>
Here is how these p elements look in the browser:
 |
| The p elements as they look in a browser. |
The br Element
The <br> element can be used to force an automatic single line break e.g. in between two paragraphs, or after a line within a paragraph. The <br> element do not need an end tag, because it is an empty element. Here is an example:
<p>
    line 1
    <br>
    line2
    </p>
Here is how the line break looks in the browser:
 |
| The br element line break as it looks in a browser. |
The hr Element
The <hr> element creates a horizontal ruler, which can be used to separate different vertical sections of your webpage. Two paragraphs following each other with a <hr> element in between will have a horizontal line displayed in between them. Here is an example:<p> paragraph1 </p> <hr> <p> paragraph2 </p>
Here is how the hr element looks in the browser:
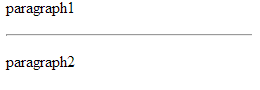 |
| The hr element horisontal ruler as it looks in a browser. |
Like the <br> element, the <hr> element is an empty element, and does not need an end tag.
The b Element
The <b> element marks text to be displayed as bold. Here is an example:
Text in <b> bold </b>
Here is how it looks in the browser:
 |
| The b element bold text as it looks in a browser. |
The i Element
The <i> elements marks text to be displayed as italic. Here is an HTML example:
This text is in <i>italic</i>.
Here is how it looks in the browser:
 |
| The i element italic text as it looks in a browser. |
The strong Element
The <strong> element is used to mark text to be displayed strong. In practice the effect is similar to the <b> element, although browsers may differentiate between the effect of the two elements. Here is an example:
This text is <strong> strong</strong>.
Here is how it looks in the browser:
 |
| The strong element text as it looks in a browser. |
The big Element
The <big> element is used to marks text to be displayed as bigger than the default text size. Here is an HTML example:
This text is <big> big text</big>.
Here is how it looks in the browser:
 |
| The big element text as it looks in a browser. |
The em Element
The <em> element marks text to be displayed as emphasized. In practice the effect is similar to that of the <i> element, although browsers may differentiate between the effect of the two elements. Here is an example:
This text is <em>emphasized</em>.
Here is how it looks in the browser:
 |
| The em element text as it looks in a browser. |
The code Element
The <code> element is used to markup blocks of text to be displayed using a monosize font, like Courier. The <code> element is typically used to display programming code. Here is an example:
<code> computer code </code>
Here is how it looks in the browser:
 |
| The code element's monospace font as it looks in the browser. |
The sub Element
The <sub> element marks text to be displayed in smaller characters (subscript). Here is an example:
<p> This is <sub> subscript </sub>. </p>
Here is how it looks in the browser:
 |
| The sub element subscript text as it looks in the browser. |
The sup Element
The <sup> element marks text to be displayed in smaller characters, but lifted up from the text base line. Here is an example:
<p> This is <sup>superscript </sup> </p>
Here is how it looks in the browser:
 |
| The sup element superscript text as it looks in the browser. |
The del Element
The <del> element marks text as deleted, meaning it will be displayed with a line through it. Here is an example:
This is <del>deleted</del>
Here is how it looks in the browser:
 |
| The del element deleted text as it looks in the browser. |
The pre Element
The pre element formats the text with a mono space font like the code element does, but the pre
element shows the line breaks you write inside it. Normally line breaks are ignored, or shown as a space. Here is an HTML example:
<pre>
    This is text inside a pre
    and line breaks are preserved
    just like in a normal text document.
</pre>
Here is how it looks in the browser:
 |
| The pre element as it looks in the browser. |
The samp Element
The samp element is used to show output from a computer in an HTML document.
The samp element also formats the text with a mono space font. Line breaks
are handled just like elsewhere in HTML. Thus, the samp element is in reality
similar to the code element.
Here is an HTML example:
<samp>
    This text is inside a
    samp element
    line 2
    line 3
</samp>
Here is how it looks in the browser:
 |
| The samp element as it looks in the browser. |
| Tweet | |
Jakob Jenkov | |


